| Availability: | |
|---|---|
UTM-1EDS
EBP INSTRUMENTS
Shanghai
90 sets / month
TT in advance
1 set
Standards
ASTMA370, ASTME4, ASTME8, ASTME9, ISO6892, ISO7438, ISO7500-1, EN10002-4, GB/T228-2002, GB 16491-2008, HGT 3844-2008 QBT 11130-1991, GB13-22-1991, HGT 3849-2008,GB6349-1986, GB/T 1040.2-2006, ASTM C165, EN826, EN1606, EN1607, EN12430 etc.
Application
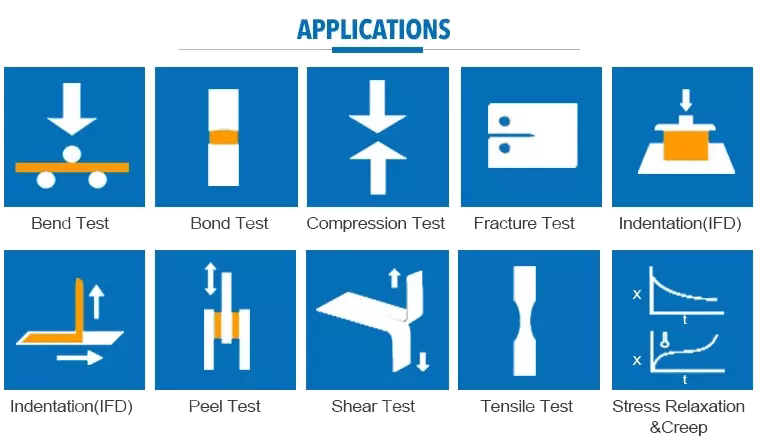
It is applicable for wide range of material for tension, compression, bending, shearing and low cycle test. Suitable for metal, rubber, plastic, spring, textile, and components testing. It is widely used in the corresponding industries, research and development, test institutes and training centers etc.

Safety Device
1. Stroke protection: double protection, prevent over preset
2. Force protection: system setting
3. Emergency stop device: handing emergencies
Specification:
Model | UTM-0.1, 0.2, 0.3, 0.5, 1, 2, 3, 5 EDS |
Structure | Single column double spaces |
Max. Load(kN) | 0.1, 0.2, 0.3, 0.5, 1, 2, 3 ,5 |
Material | All aluminum alloy surface spray painting shell |
Load accuracy | ISO 7500Class1 |
Load range | 2%~100%F·S |
Load resolution | 1/ 50000 |
Resolution of displacement | 0.01mm |
Test speed(mm/min) | |
within ±1% set speed | |
E-Tensile space(mm) | 600 (can be customized) |
E-Compression space(mm) | 600 (can be customized) |
D-Test width(mm) | 100 |
F-Beam travel distance(mm) | 772 |
26 | |
158 | |
Power supply | AC220V±10%, 50Hz/60Hz(can be customized) |

Standard Accessories | Optional configurations |
Host | |
High strength main unit | |
Aarc synchronous deceleration system | |
ABBA High precision ball screw | |
Panasonic AC Servo motor | |
Compression Grip Platen Ф100mm | Other Fixture Bending Fixture |
Tensile fixture | |
Test control system | Optional |
Sensor High precision load sensor | US Celtron spoke load sensor |
LCD controller | Touch screen display |
Main Frame:
 1.Adopt single column structure, lower for tensile, upper for compression, double space. The beam is step less lifting, light but rigid.
 2.Adopting ball screw drive, realize no clearance transmission, make sure the precision control of the test force and deformation speed.
3.The photoelectric encoder is the displacement sensor, with high resolution, strong anti-interference ability.
4.The shield plate with limit mechanism used to control the beam moving range, in order to avoid sensor damaged due to the moving distance is too large.
5.The table, moving beams is made of high quality precision
machining steel plate , not only reduce the vibration
generated by specimen fracture, but also improve the stiffness.
6.The motor tail is upwards, above the work surface, this
design makes the main unit lower space narrowing, the whole machine is more coordinating, and more easy to spread out the heat generated by the motor rotation, extend electrical components life.
7.Three columns of mandatory orientation, make the main unit rigidity much improved, to further ensure the repeatability of measurement.
8.Adopt bolt type grip installation, make the grip replace easier.
Controller function & Features:
1. Automatic calibration: system can automatically realize the accuracy of the calibration value.
2. After the sample broken, automatic stop.
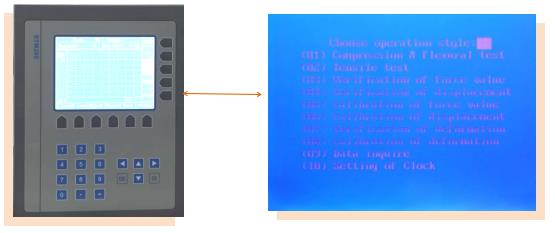
3. Automatic display: Real-time display testing force, displacement, testing speed, peak value, testing status on one LCD.
4. Automatic return: beam automatic return to initial position when testing finished.
5. Breakage judgment: sample after fracture,beam automatic stop moving
6. Limiting protection: Program control and Mechanical limiting protection.
7. Overload protection: When more than 3 ~ 5% of the rated load device automatically stop working.
8. Automatic calculation: automatic calculation area after input sample diameter (round); Width, thickness (flat), sample gauge ect.
LCD Controller Function Features
1. Automatic calibration: system can automatically realize the accuracy of the calibration value.
2. After the sample broken, automatic stop.
3. Automatic display: Real-time display testing force, displacement, testing speed, peak value, testing status on one LCD.
4. Automatic return: beam automatic return to initial position when testing finished.
5. Breakage judgment: sample after fracture,beam automatic stop moving
6. Limiting protection: Program control and Mechanical limiting protection.
7. Overload protection: When more than 3 ~ 5% of the rated load device automatically stop working.
8. Automatic calculation: automatic calculation area after input sample diameter (round); Width, thickness (flat), sample gauge ect.

Standards
ASTMA370, ASTME4, ASTME8, ASTME9, ISO6892, ISO7438, ISO7500-1, EN10002-4, GB/T228-2002, GB 16491-2008, HGT 3844-2008 QBT 11130-1991, GB13-22-1991, HGT 3849-2008,GB6349-1986, GB/T 1040.2-2006, ASTM C165, EN826, EN1606, EN1607, EN12430 etc.
Application
It is applicable for wide range of material for tension, compression, bending, shearing and low cycle test. Suitable for metal, rubber, plastic, spring, textile, and components testing. It is widely used in the corresponding industries, research and development, test institutes and training centers etc.

Safety Device
1. Stroke protection: double protection, prevent over preset
2. Force protection: system setting
3. Emergency stop device: handing emergencies
Specification:
Model | UTM-0.1, 0.2, 0.3, 0.5, 1, 2, 3, 5 EDS |
Structure | Single column double spaces |
Max. Load(kN) | 0.1, 0.2, 0.3, 0.5, 1, 2, 3 ,5 |
Material | All aluminum alloy surface spray painting shell |
Load accuracy | ISO 7500Class1 |
Load range | 2%~100%F·S |
Load resolution | 1/ 50000 |
Resolution of displacement | 0.01mm |
Test speed(mm/min) | |
within ±1% set speed | |
E-Tensile space(mm) | 600 (can be customized) |
E-Compression space(mm) | 600 (can be customized) |
D-Test width(mm) | 100 |
F-Beam travel distance(mm) | 772 |
26 | |
158 | |
Power supply | AC220V±10%, 50Hz/60Hz(can be customized) |

Standard Accessories | Optional configurations |
Host | |
High strength main unit | |
Aarc synchronous deceleration system | |
ABBA High precision ball screw | |
Panasonic AC Servo motor | |
Compression Grip Platen Ф100mm | Other Fixture Bending Fixture |
Tensile fixture | |
Test control system | Optional |
Sensor High precision load sensor | US Celtron spoke load sensor |
LCD controller | Touch screen display |
Main Frame:
 1.Adopt single column structure, lower for tensile, upper for compression, double space. The beam is step less lifting, light but rigid.
 2.Adopting ball screw drive, realize no clearance transmission, make sure the precision control of the test force and deformation speed.
3.The photoelectric encoder is the displacement sensor, with high resolution, strong anti-interference ability.
4.The shield plate with limit mechanism used to control the beam moving range, in order to avoid sensor damaged due to the moving distance is too large.
5.The table, moving beams is made of high quality precision
machining steel plate , not only reduce the vibration
generated by specimen fracture, but also improve the stiffness.
6.The motor tail is upwards, above the work surface, this
design makes the main unit lower space narrowing, the whole machine is more coordinating, and more easy to spread out the heat generated by the motor rotation, extend electrical components life.
7.Three columns of mandatory orientation, make the main unit rigidity much improved, to further ensure the repeatability of measurement.
8.Adopt bolt type grip installation, make the grip replace easier.
Controller function & Features:
1. Automatic calibration: system can automatically realize the accuracy of the calibration value.
2. After the sample broken, automatic stop.
3. Automatic display: Real-time display testing force, displacement, testing speed, peak value, testing status on one LCD.
4. Automatic return: beam automatic return to initial position when testing finished.
5. Breakage judgment: sample after fracture,beam automatic stop moving
6. Limiting protection: Program control and Mechanical limiting protection.
7. Overload protection: When more than 3 ~ 5% of the rated load device automatically stop working.
8. Automatic calculation: automatic calculation area after input sample diameter (round); Width, thickness (flat), sample gauge ect.
LCD Controller Function Features
1. Automatic calibration: system can automatically realize the accuracy of the calibration value.
2. After the sample broken, automatic stop.
3. Automatic display: Real-time display testing force, displacement, testing speed, peak value, testing status on one LCD.
4. Automatic return: beam automatic return to initial position when testing finished.
5. Breakage judgment: sample after fracture,beam automatic stop moving
6. Limiting protection: Program control and Mechanical limiting protection.
7. Overload protection: When more than 3 ~ 5% of the rated load device automatically stop working.
8. Automatic calculation: automatic calculation area after input sample diameter (round); Width, thickness (flat), sample gauge ect.
